SSH login with 2-Factor Authentication
During the holiday time, I was discussing with a mate on ways I could make my server more secure and he said why don’t I have 2-Factor Authentication. Of course, I dismissed him as a crazy man saying you can do that on SSH! When I actually looked I saw it could be done and it is a common place to have it done as well. I found a super page that explains how 2-Factor Authentication all works! With this in mind, this post will show how you can enable a SSH server with 2-Factor Authentication.
As always, I’ll be using Ubuntu 14.04 LTS. Because I use Google Authenticator for other things, I was happy to see that you can install Google Authenticator’s time-based one-time password (TOTP) via the apt-get repository. To install 2-factor authentication with Google Authenticator, we’ll need the open-source Google Authenticator PAM module. PAM stands for Pluggable Authentication Modules (PAM) provide dynamic authentication support for applications and services in a Linux. Essentially, it’s a way to easily plug different forms of authentication into a Linux system.
Firstly you will need to have Google Authenticator or Authentication App installed on your phone before doing anything. Personally I use Google’s Authenticator, for iOS App Store, for Android Google Play. Microsoft has their own Authenticator App for Windows Phones.
With the Authenticator installed on your phone, next you will need to install the Google package. You will need to have root and/or sudo access to the server and apt-get libpam-google-authenticator
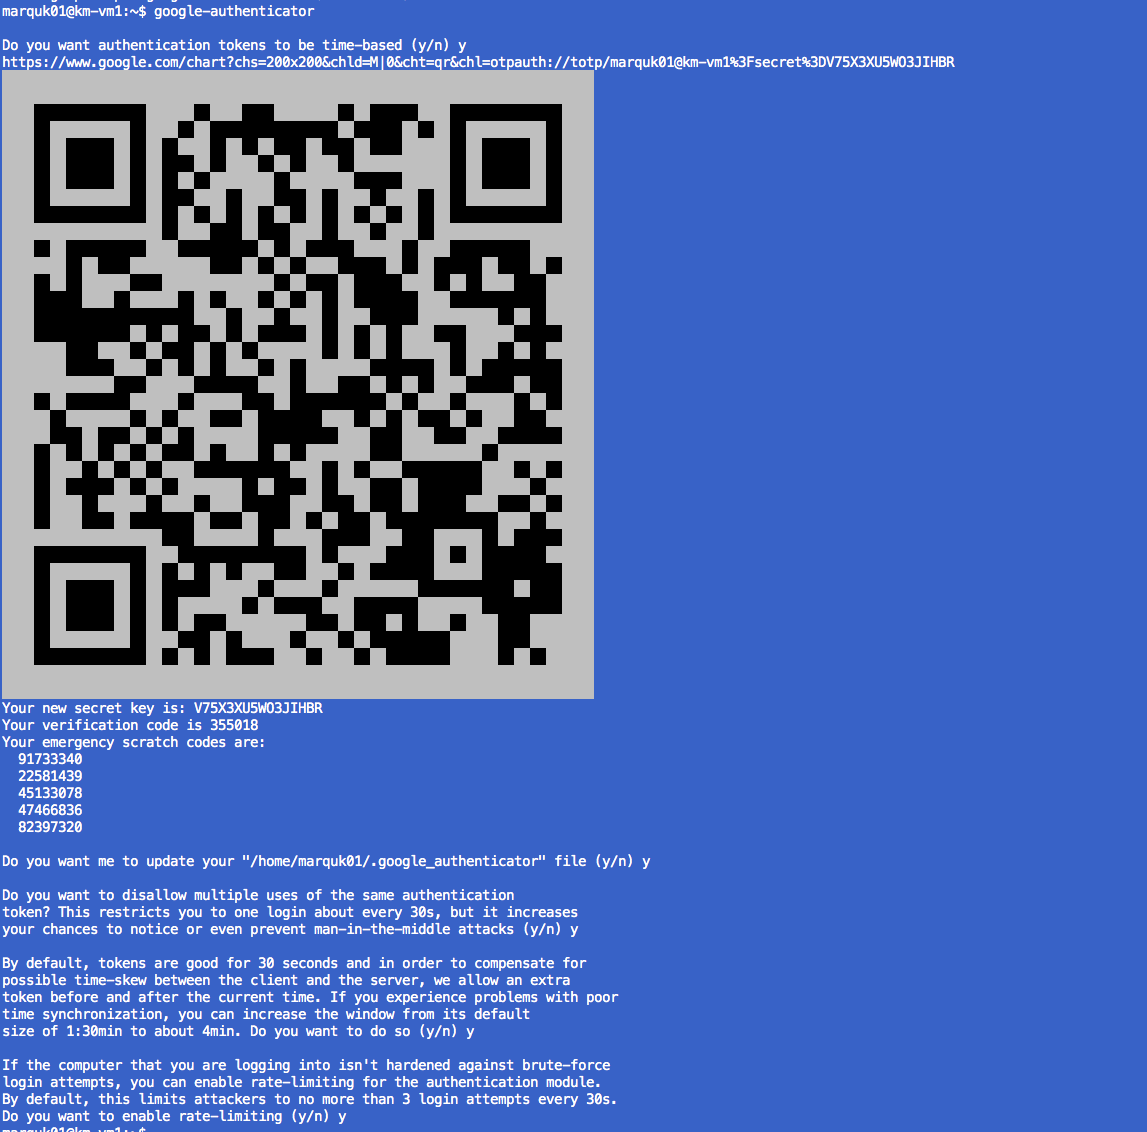
With the Module installed, you can set up your users with their OTP token. Run the google-authenticator utility, once ran you will be asked a series of questions that you can answer however best for you environment.
marquk01@km-vm1:~$ google-authenticator

Do you want authentication tokens to be time-based (y/n) y
https://www.google.com/chart?chs=200x200&chld=M|0&cht=qr&chl=otpauth://totp/marquk01@km-vm1%3Fsecret%3DXYC73MOQV7SMPOSJ
Your new secret key is: XYC73MOQV7SMPOSJ
Your verification code is 194186
Your emergency scratch codes are:
  28140794
  43020525
  41649070
  99131075
  14555358

Do you want me to update your "/home/marquk01/.google_authenticator" file (y/n) y

Do you want to disallow multiple uses of the same authentication
token? This restricts you to one login about every 30s, but it increases
your chances to notice or even prevent man-in-the-middle attacks (y/n) y

By default, tokens are good for 30 seconds and in order to compensate for
possible time-skew between the client and the server, we allow an extra
token before and after the current time. If you experience problems with poor
time synchronization, you can increase the window from its default
size of 1:30min to about 4min. Do you want to do so (y/n) y

If the computer that you are logging into isn't hardened against brute-force
login attempts, you can enable rate-limiting for the authentication module.
By default, this limits attackers to no more than 3 login attempts every 30s.
Do you want to enable rate-limiting (y/n) y
marquk01@km-vm1:~$
You will need to keep safe the Emergency Scratch codes, just in case you lose access or have an issue with your OTP token. Your secret key will be used on the Authenticator app to generate your verification code. You can either manual enter the code or you can use scan QR-code that is generated on the cli to your phone. This is what you should expect to see when you run the
google-authenticatorutility. Once that’s has been done you will you should get something like this on your app
Next we will need to activate Google Authenticator within the sshd daemon. Firstly you will need to edit /etc/pam.d/sshd file by adding following lines below:
marquk01@km-vm1:~$ sudo nano /etc/pam.d/sshd
{...}
# To allow Google Authenticator for 2 factor authentication
auth required pam\_google\_authenticator.so
Then you will need to edit the /etc/ssh/sshd_config file. Look for the ChallengeResponseAuthentication and ensure that this is yes
marquk01@km-vm1:~$ sudo nano /etc/ssh/sshd\_config
{...}
# Change to yes to enable challenge-response passwords (beware issues with
# some PAM modules and threads)
ChallengeResponseAuthentication yes
The full files should look something like this sshd and sshd_config
Now we need to restart the sshd daemon.
sudo service ssh restart
Now that the ssh daemon has been restarted when you try and ssh back onto the server, you will be asked for your password and the OTP verification code
marquk01@netlab ~$ ssh 10.1.0.137
Password:
Verification code:
It also worked with Secure Copy Protocol (SCP), which allows transfer files via Secure Shell (SSH)
marquk01@netlab ~$ scp bird.conf.oringial [email protected]:/home/marquk01
Password:
Verification code:
bird.conf.oringial                            100% 6222     6.1KB/s   00:00
ALL Userswill need to be configured to have 2-factor authenticationbeforeediting the ssh daemon. When I tried this the first time, I assumed it was pre-user enabled the everything to find out my main account was locked out… #GenuisAtWork! In addition, if you have a key-based authentication, they will take supersede 2-Factor Authentication and this will be ignored